An Effective Website Planning, Design and Development Process
Building or refreshing a school or nonprofit website takes time and collaboration to be successful. Our website projects go smoothly because our process is well planned and organized and are most effective when the client participates in the process enthusiastically.
Here is our Guide To An Effective Website Development Process:
Initial Onboarding (1-2 Weeks)
When a client hires us to help with their website, they sign a contract and pay a deposit. Following this, we send them some forms to help get started with strategy and development. These include:
Client Survey: Ask about organization in general, goals for website, target audience, competition, to give us a better idea of who you are, and also to make sure all stakeholders are in agreement about the strategic direction.
Website Credentials Form: Acquire logins for relevant properties like Domain Registration, Website Hosting, CRM and Social Media URLs.
Content Inventory: We use a Google Sheet and list all front-facing pages on the existing website (if there is an existing website to begin with), with a description of content and images on each page.
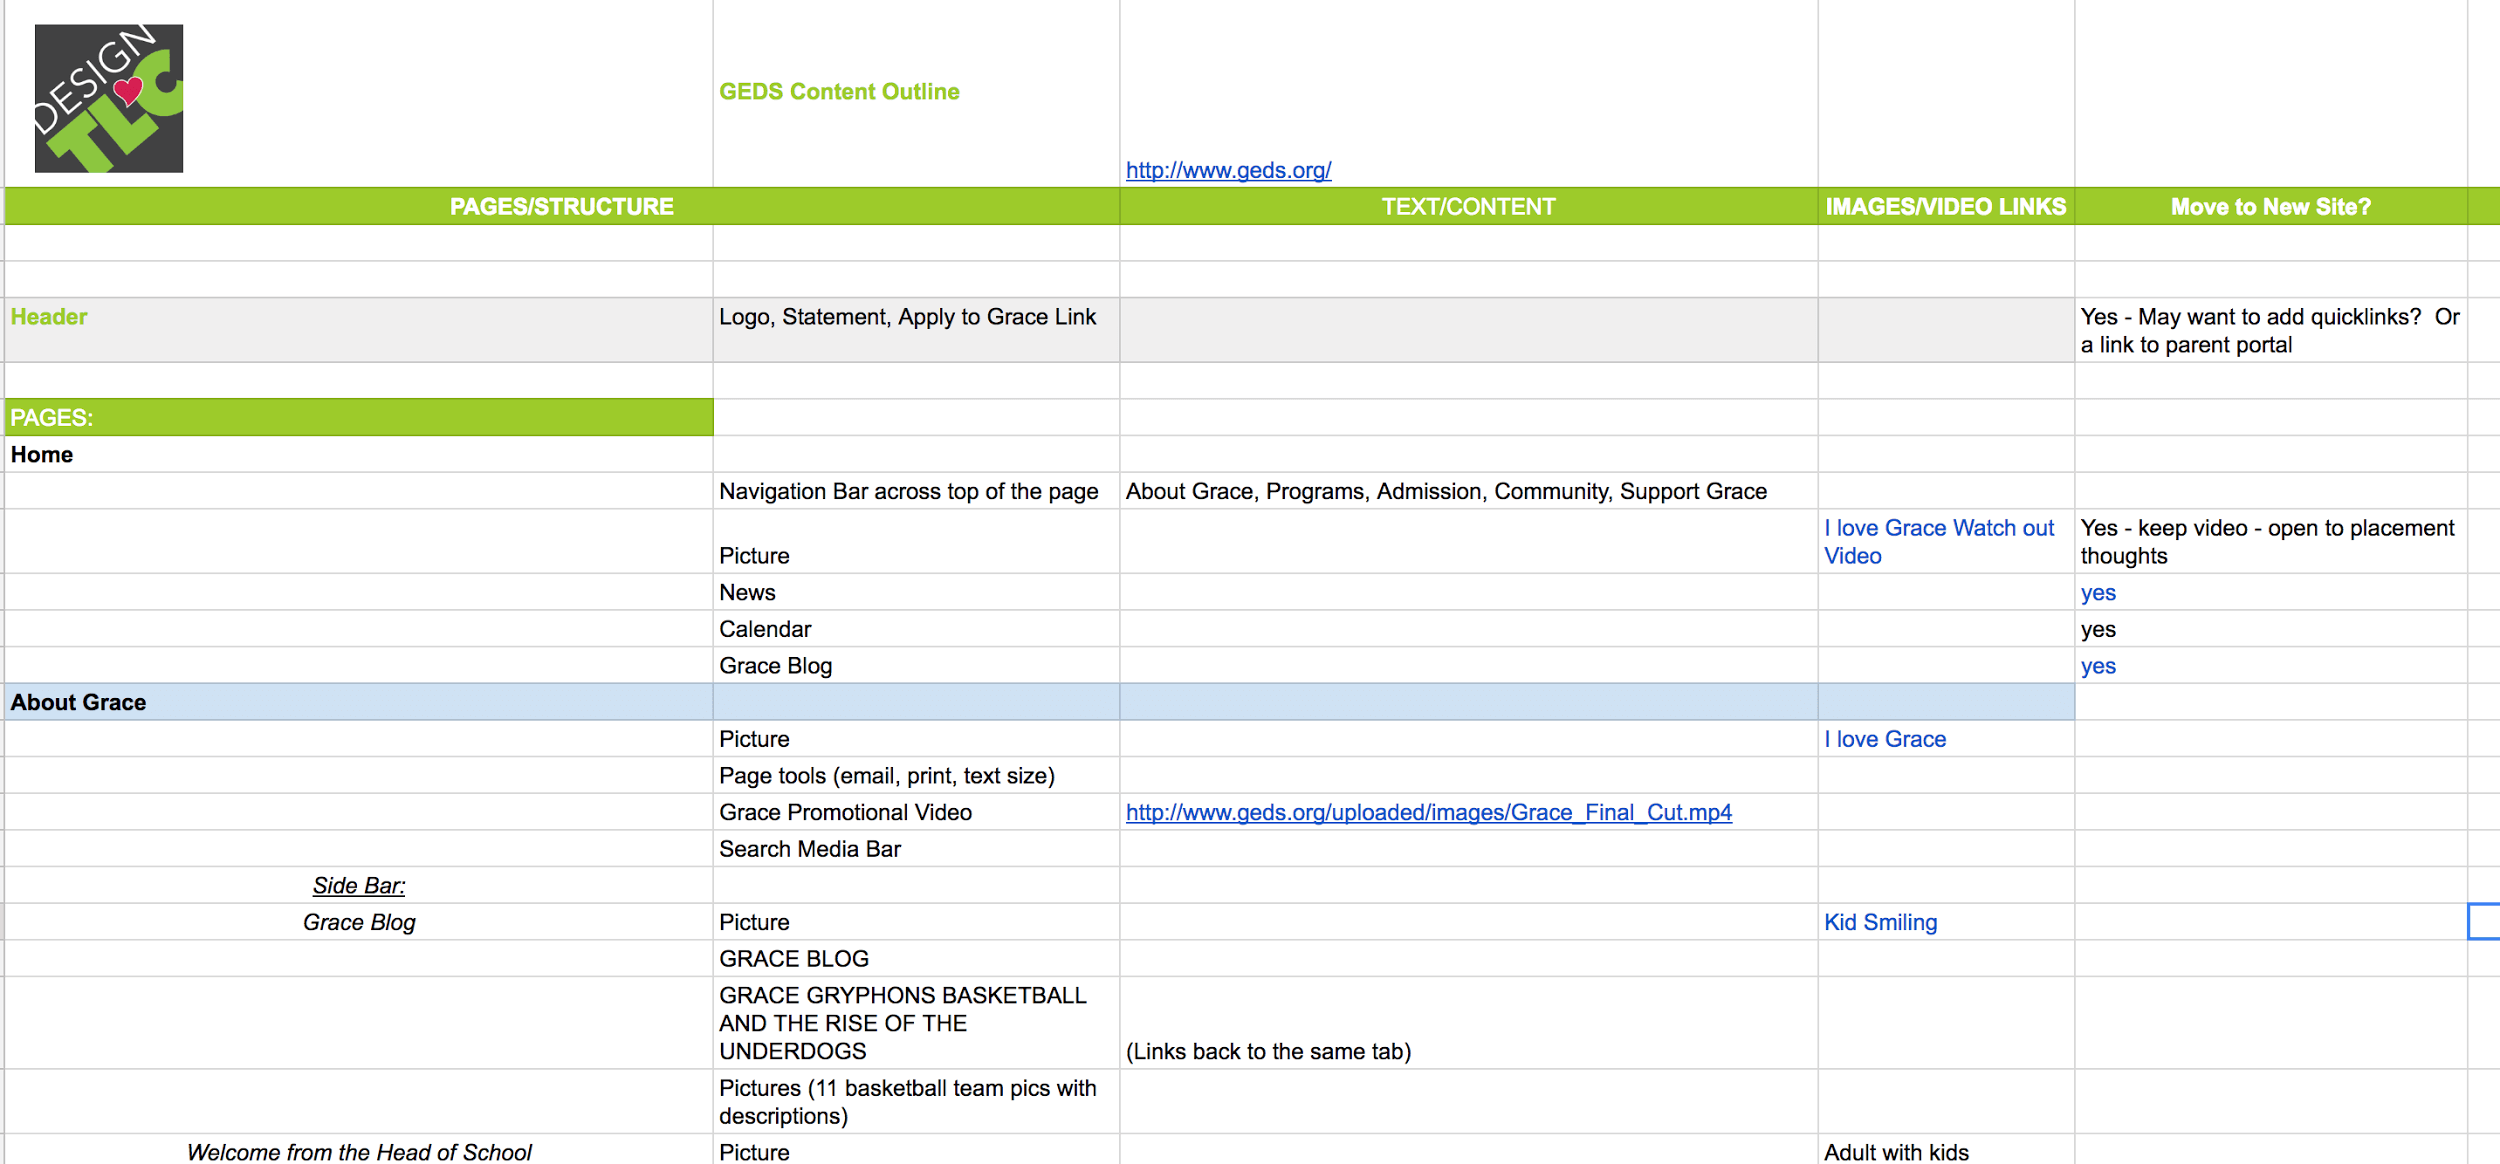
Complete Content Inventory: In addition to the “manual” inventory, we use a tool called Screaming Frog to pull a list of urls for the current site. This is used to anticipate the amount of content to be migrated to the new site and/or the number of redirects that may be needed upon site launch. We make sure any pages that have been indexed by Google are tracked here so we can redirect them to avoid 404 errors.
![]()
Timeline
Also in the Google Sheet, we make a tab with a preliminary/rough timeline.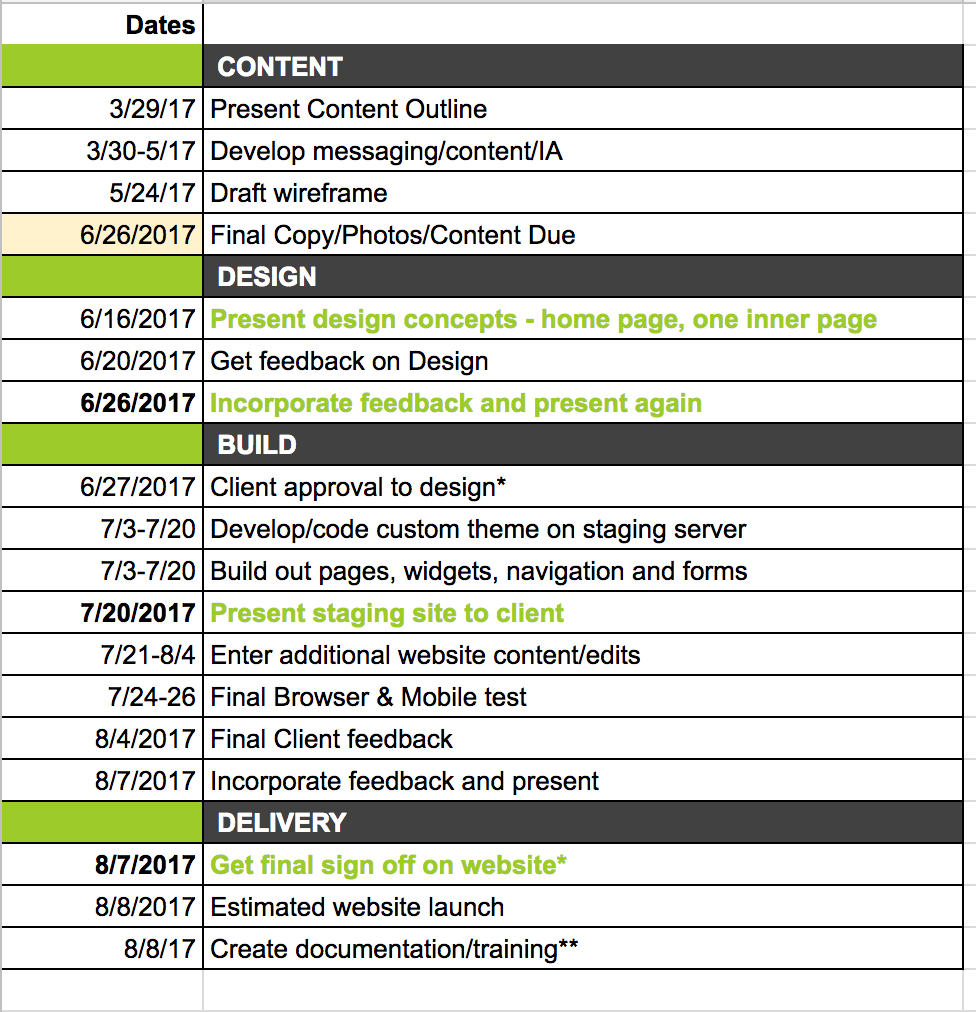
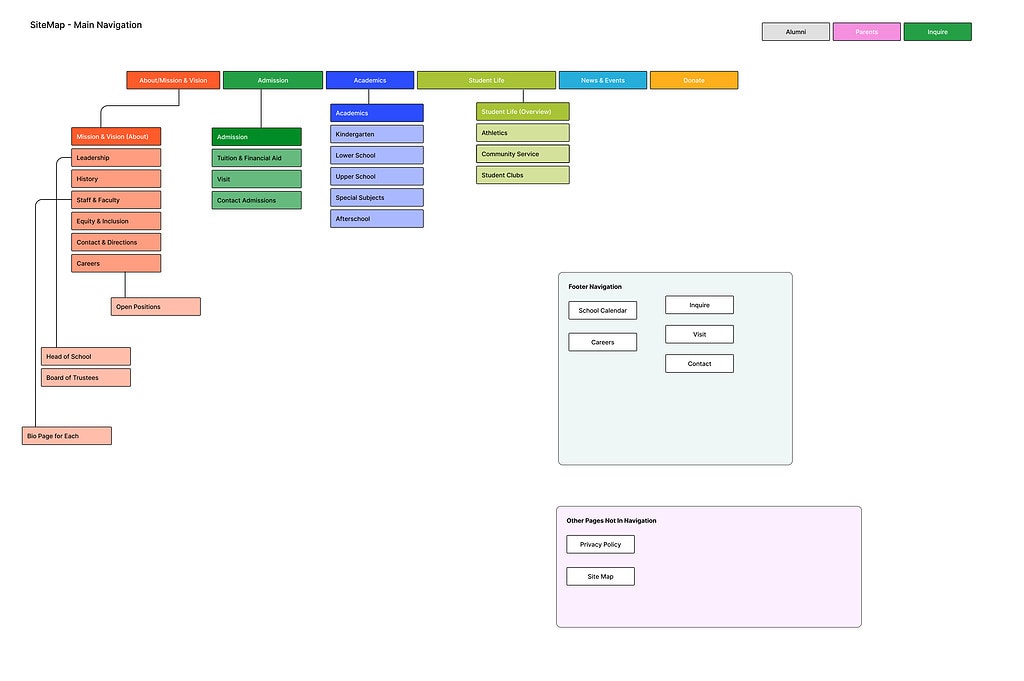
Information Architecture & Initial Content Development (2-3 weeks)
Working with the client and, occasionally, a content writer, the next step is to develop a well thought out Information Architecture (IA) or sitemap for the website. We list pages in the Google Sheet, and also provide a visual representation of the navigation.
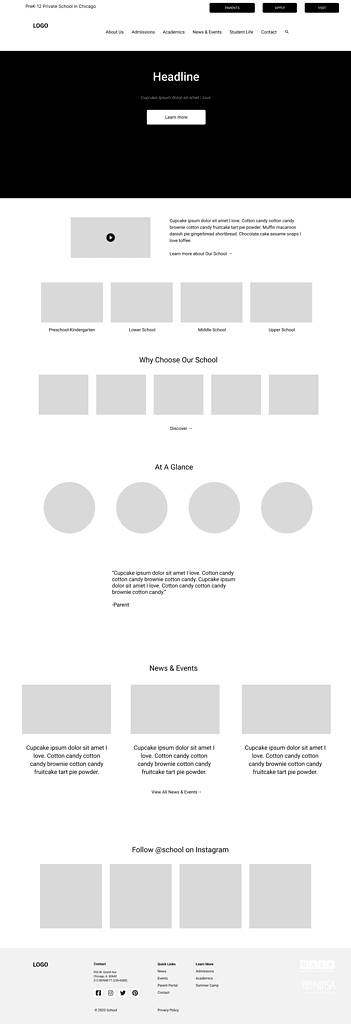
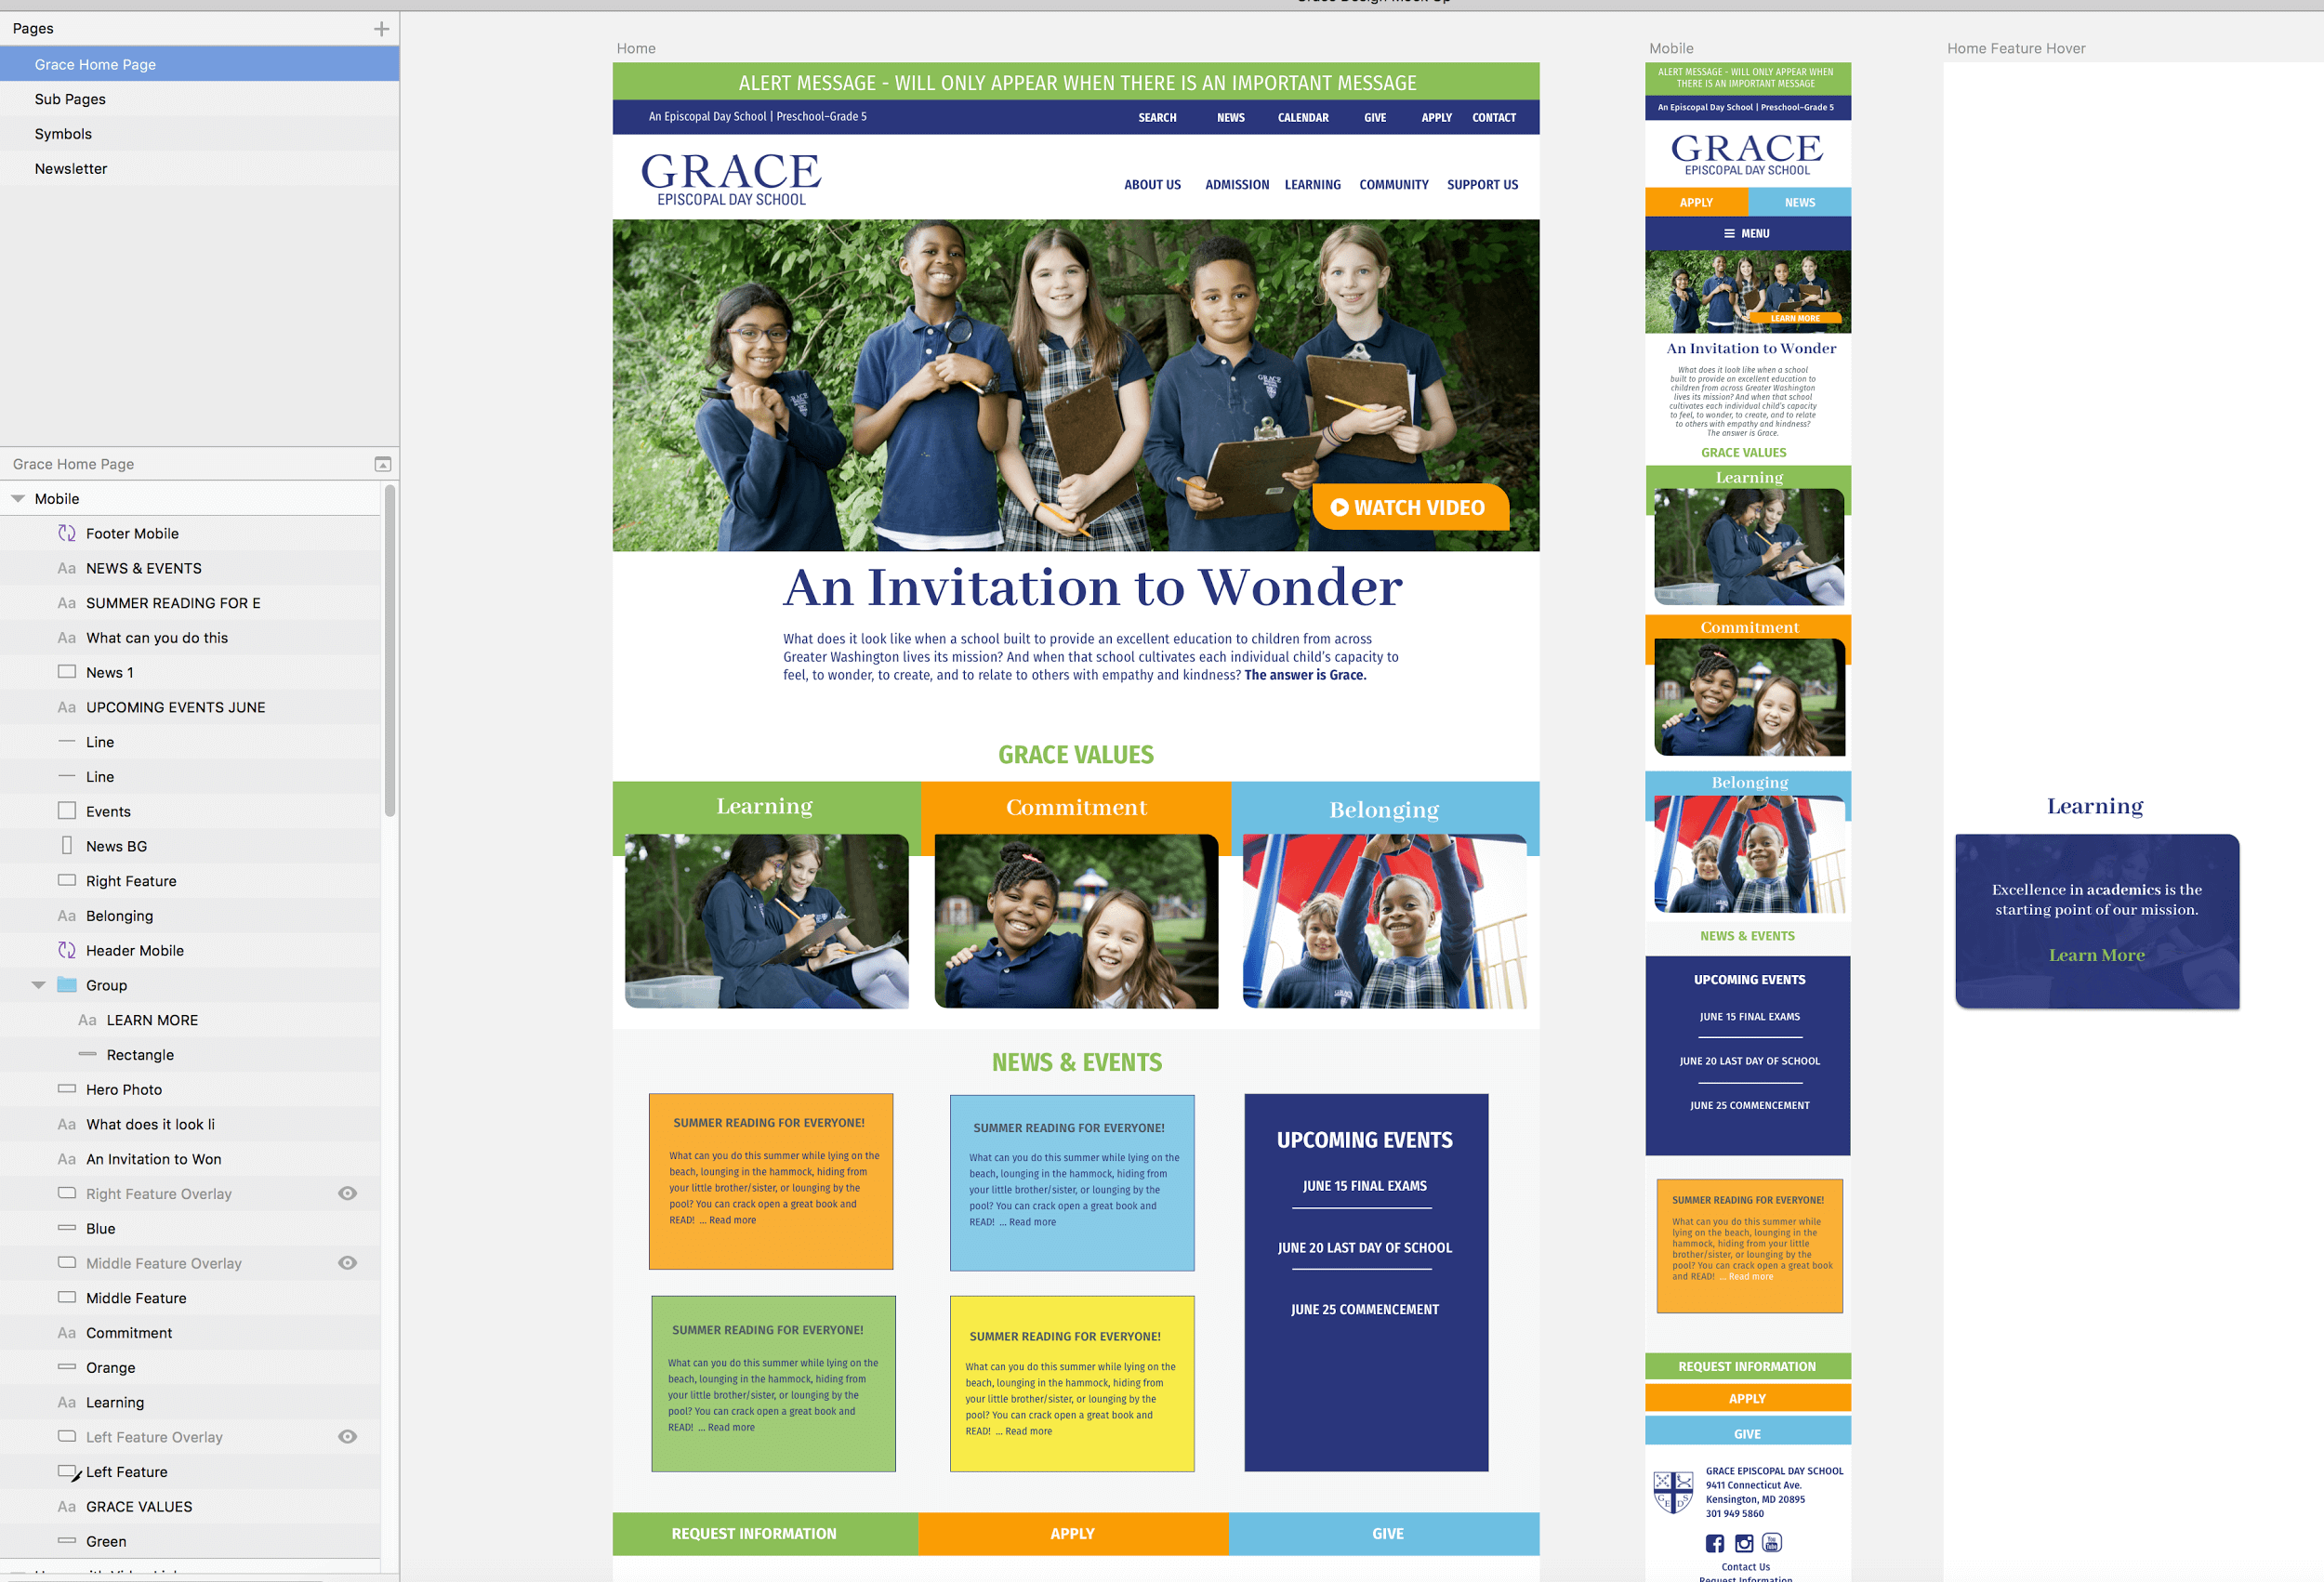
Home Page Wireframe (2-3 weeks)
A wireframe is a visual representation of a webpage. We typically do a wireframe of the Home Page, and sometimes additional pages if there are pages that have a lot of information that needs to be organized to be user-friendly. The wireframe is not a design. It guides the design process by identifying what content goes in what order on the Home Page, kind of like a blueprint floorplan for a house tells the structure of the house but does not tell what colors and other design elements will go in each room.
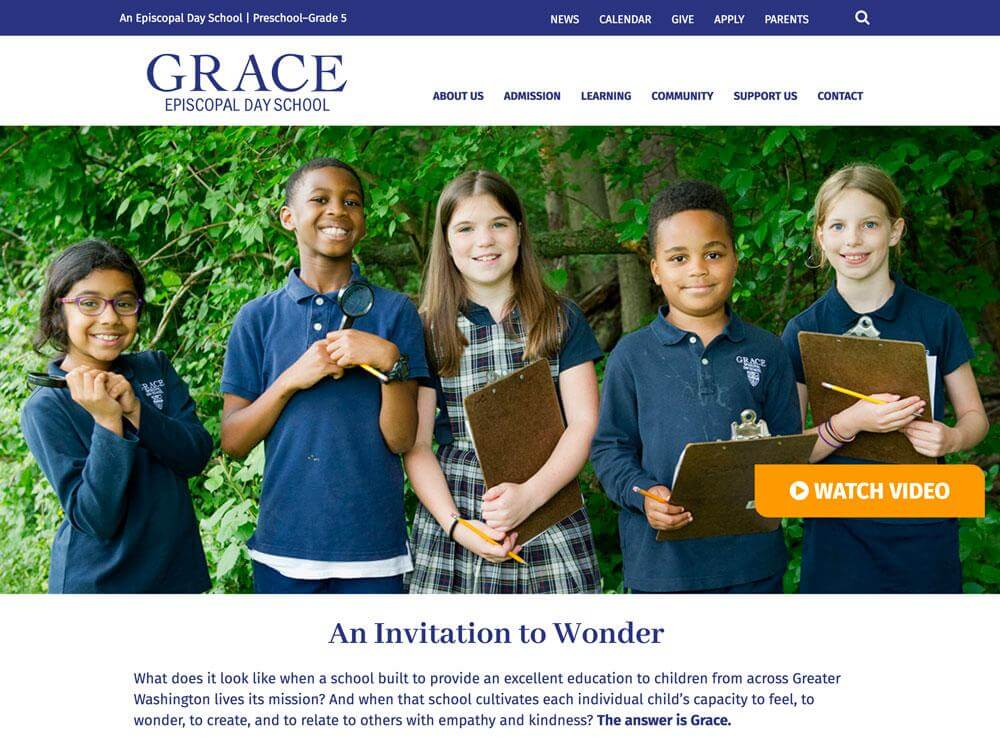
Design (3-8 weeks)
We use Figma to create webpage design prototypes. The elements from the prototype can be exported for use on the web, and allows the presentation of the mock-up designs to more closely resemble an actual website and includes some interactivity (hover effects, links, etc.). Fgima has a commenting feature which can be used to gather feedback.
If the client has a logo, it is best to use or create an svg version of the logo, which makes the graphic crisper and scalable.
Once the design is tweaked and client feedback addressed, the design is approved. This signals the official start of development and coding on a staging server. Often, we will start development to some degree before this point, if there are elements in the design we want to check out before presenting to ensure we can deliver the functionality/effects. Design approval is a key milestone. Also like building a house, once the foundation is laid and the walls are framed and painters have painted the walls, it is a significant request to ask walls to be moved, foundations to be expanded, and walls to be repainted. A significant request is a change order, which increases the cost of the project. If the design is based on a well thought out IA and wireframe, the chances of changes after design approval are small. If the IA and wireframe steps are skipped, it is more likely that the design will need changes because the content will change as the client “sees” the website unfold. This is why the content planning, architecture and wireframe steps are so important.
Final/Complete Content Development & SEO (3-6 weeks - overlaps with Design and Development)
Every word of content does not have to be finalized when the design is approved, but the home page content is needed and subpage content sources are identified. The more thorough and complete this content is, the faster and smoother the development process will be. Working with a professional writer who knows how to format and provide clear, concise copy, can make the process go smoothly and the end result better. Minor edits will likely be made before launch, but loading in copy that is organized and approved is the ideal process.
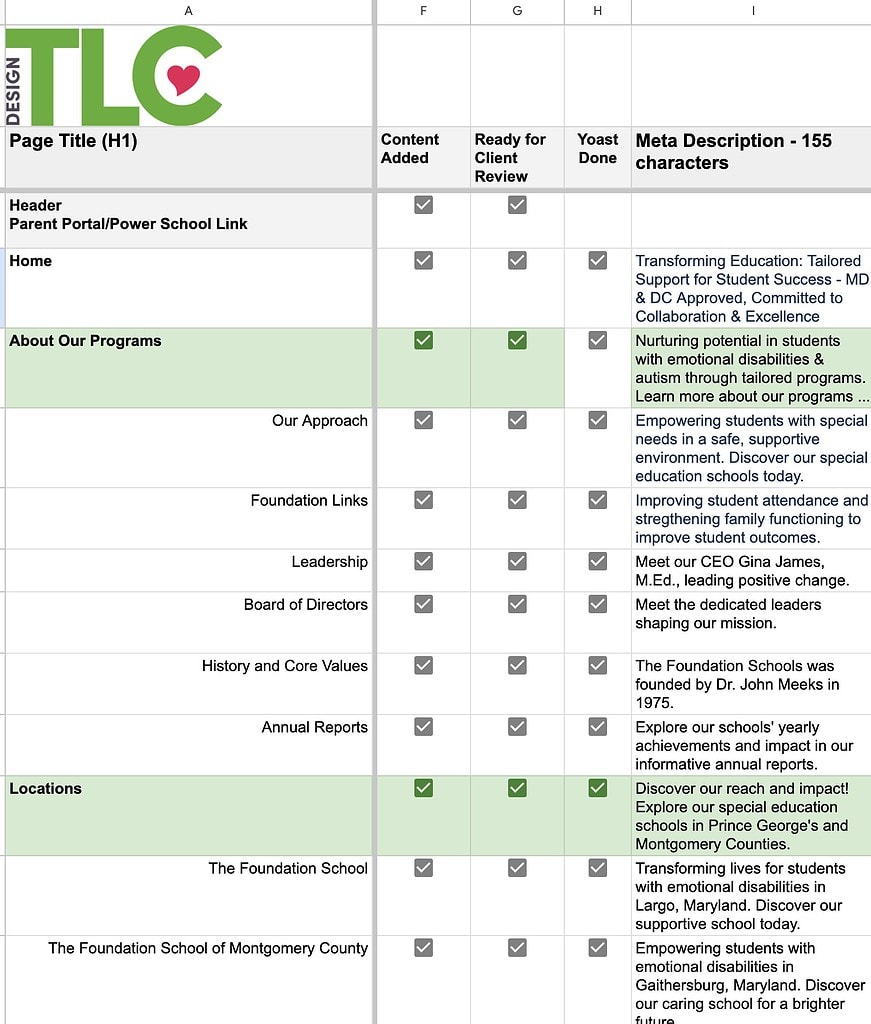
We keep track of the content for each page to know which pages are complete and ready for client review. We do some basic keyword research to help create a benchmark before we launch a new website, and to give our clients some information on where they currently rank for some keywords and where some keyword opportunities exist. They can then incorporate these terms into their new copy, as well as in the meta descriptions, which we can customize for them using the Yoast SEO Plugin for WordPress.
Development (3-4 weeks)
We use Beaver Builder and Beaver Themer to create a website that matches the custom design. We create a child theme and customize the code for specific design and functionality. We build the website on a staging server, ensuring that it is hidden from Google to avoid duplicate content. This allows the current live website to be unaffected by the new website development, to have its content accessible for copying as needed, and to make the staging/development site easy to access for review and testing.
Once the content is loaded into the site, each page gets attention for specific design/style and is also reviewed for mobile responsiveness. This process often begins around the same time that the staging site is presented to the client, so that they can see the direction of individual page styling and content and provide any feedback before it gets too far along.
Development moves forward to address any issues found by the client on the staging site, to add additional images and content and make other tweaks to design for various screen sizes and browsers.
Final Pre-Launch Tasks (1-2 weeks)
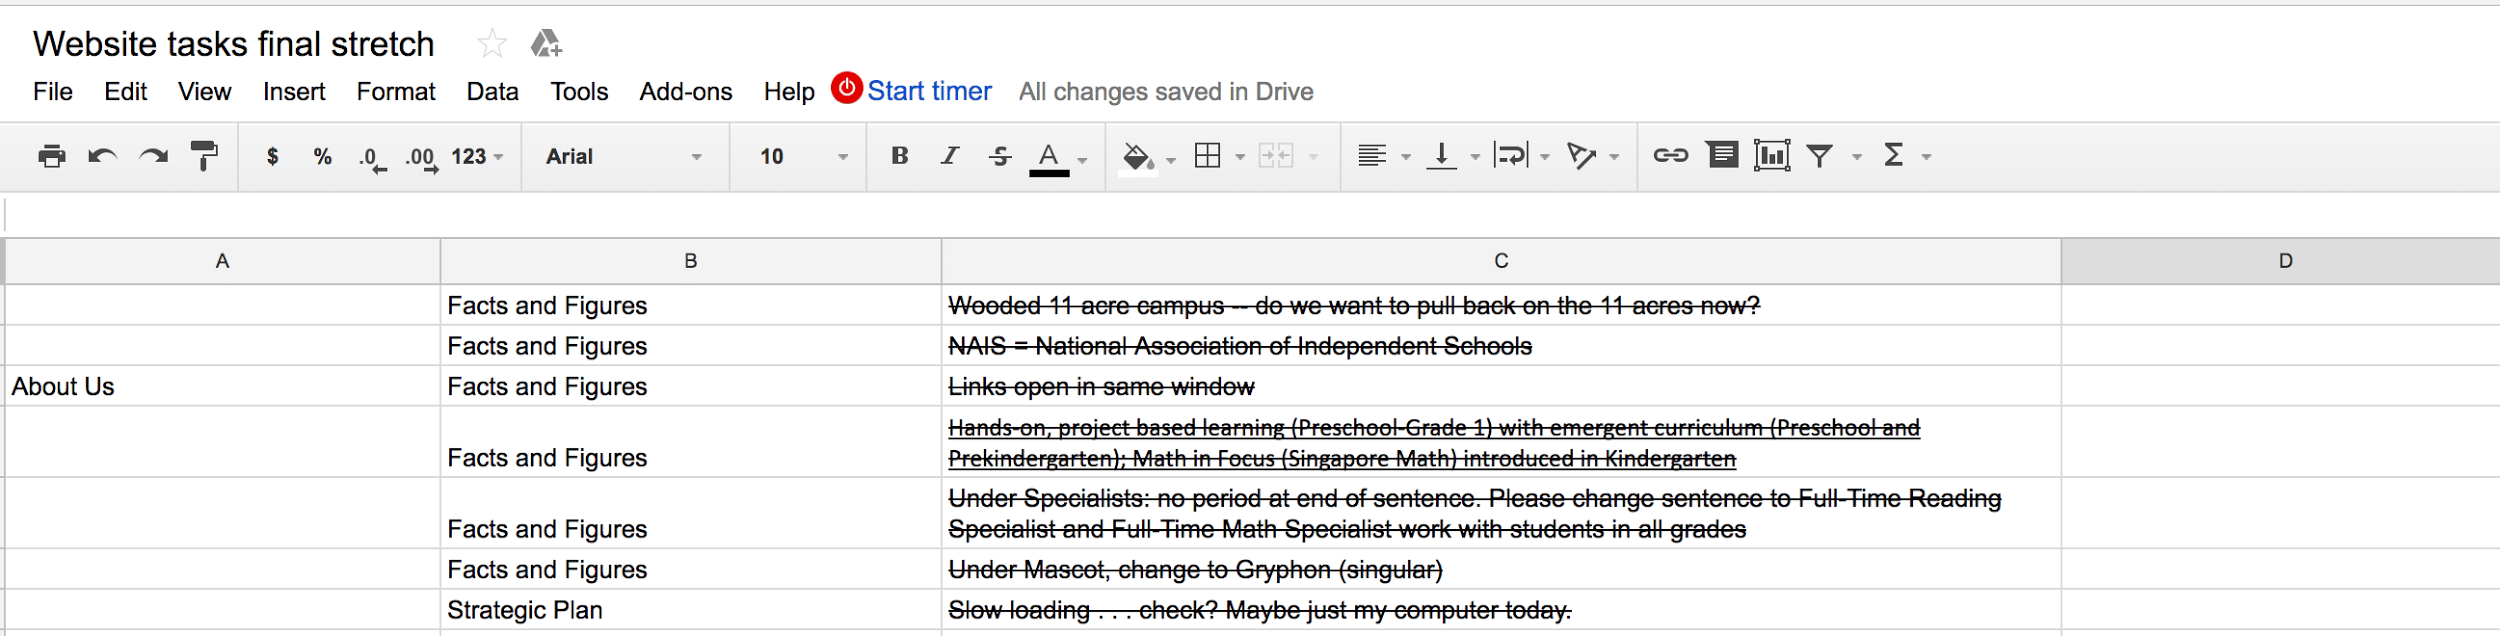
In the last days before launch, the client sends edits. Most clients want to send edits piecemeal. We request that clients send all edits (or as many as possible) in one document. Using Google Drive/Google Sheet for this is a great solution, because changes can be tracked and new change requests can be added.
Creating 301 Redirects is important to ensure that pages from the former site are not lost when the new website is launched. This can be done with a plugin, or with code to be placed in the .htaccess file.
Launch
On launch day, ideally, we work with a client’s IT company to change the DNS settings. If there is no IT provider, we will change the A Record for the domain. We avoid touching the main name servers and/or MX (mail) records if at all possible.
We also ensure the SSL certificate is installed on the live domain.
After the DNS has been changed, we monitor the propagation with a tool like https://www.whatsmydns.net/. We change the settings on the staging site and do a complete Search/Replace to change all the staging urls on the site to the live url. We check the robots.txt file and other settings in Google Search Console and ensure the site is working in Google Analytics.
Post Launch
1-2 weeks after launch, we meet with the client to do a one hour tutorial. We put specific instructions for general as well as site-specific tasks on the back end of the website. This gives us an opportunity to make any minor edits with the client and show them how to make changes, upload images, write blog posts, etc.
This is also the time when we move clients on to one of our maintenance plans. We have a variety of options so clients can select a plan that fits their needs.
I also do a debrief to compare our estimated to actual hours spent. This is helpful in creating future website proposals. I find things often take longer than I think they did, so it is a good idea (even if it is hard!) to track your time as accurately as possible using a tool like Toggl. (You can read a review of Toggl here.)
Celebrate! Share the good news on social media and document what worked and what you would change to improve the process next time.