How to resize and prepare images for use on your WordPress website
 Images are a key to a blog or website. Bad quality images will make your site look unprofessional. Images that are too large will slow down the load time of your site. Images that the wrong dimensions and shape will mess up a page layout
Once you have selected an image or images for your site, there are two important steps to take before uploading to your website:
Format/Cropping/Layout
There are two primary formats for use on the web (there are others, including GIF, but these two are the main formats you will see/use … SVG is a newer format being used more often, but I am not going to get into SVG here): JPEG and PNG. JPEGs should be used for photographs and other images that involve a large variety of colors, and PNGs should be used for simpler images, such as logos, and photos or images that need to have a transparent background. A JPEG is a compressed file format, which results in a smaller file size and a loss in quality. A PNG is uncompressed, which means that the quality is better but the file size is larger. If you have a tool like Photoshop, you can convert an image to whichever file format you need. Most likely your image source will already be one of these two formats to being with.
Now that you understand the file format options, the next important consideration for your image is its size and shape. Ideally, your image should be cropped to eliminate unnecessary background area, etc. and to be the orientation that will fit where it needs to go. If you are adding an image to a page with other images, you might want your image to be the same size or orientation so it matches. Don’t put a vertical image in a space that is meant for a horizontal space, such as a slider. In some cases that can result in the image being distorted

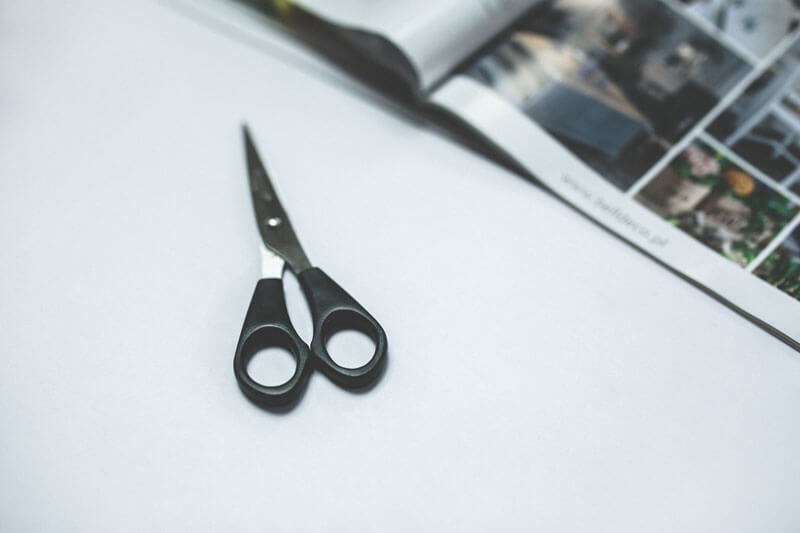
Original image with vertical orientation
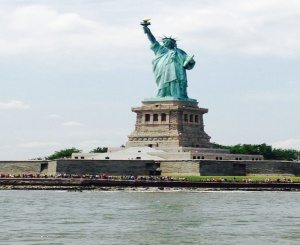
Image uploaded to a space the is not vertical, resulting in distortion
As a general rule, an image inserted into a standard page or blog post should not need to be any larger than 1000px (at 72dpi)*, unless you want them to be (and your theme supports) a full page width image.
Free applications such PicMonkey, MS Paint (Windows) and Preview (Mac) can be used to crop and resize photos and images. Paid software, including Adobe Photoshop and Lightroom do this and more, including optimize your image (“Save for Web”) which eliminates the need for the next step:
Uploading to your website
A well proportioned and formatted photo is a great start. However, if your photos are too large, they can slow down your website. In most cases, images larger than 1MB are way too big. If you save your image, as noted in the first step, at a maximum of 1000px at 72dpi, it is probably ok … but should still be optimized to minimize the space it takes on your server. Plugins such as ImageOptim, Tiny PNG, WP Smush and
EWWwill automatically optimize images when you upload them to your media library. Some provide “lossless” optimization, where the image file size is reduced without any negative effect on its quality
Upload and Insert
Once your image is uploaded, you can insert it into your page or post. There are a few important things to do before hitting the “Insert” button, however!
Enter alt text. Alt text/alt tag is that that text appears inside the image container when the image can not be displayed. It also helps search engines understand what an image is about. The most recent version of WordPress now gives a warning if you do not set an alt tag for your image. Images without alt tags are bad for SEO but more importantly, they make your site less usable/accessible for people with disabilities and others using a screen reader. After uploading your image you will see a place to enter a description of your image in the “Alt Text” box. Type what you would want someone to know about the image if they can’t see it, for example, “This is a photo of a person smiling.” Yoast and Google also recommend that at least one image on a post/page contain the focus keyword for that page to improve SEO.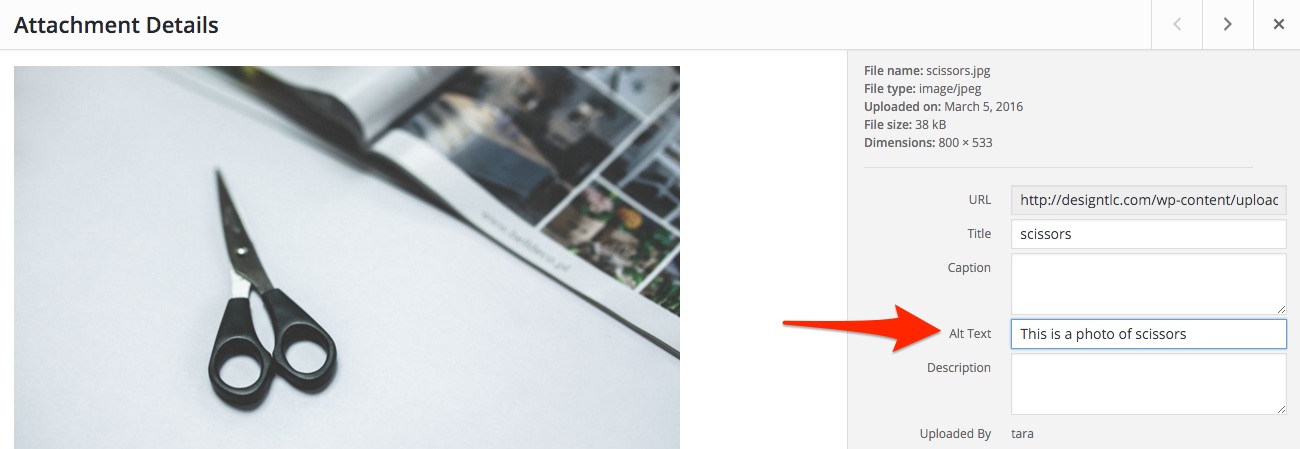

Images are so important to your website and blog posts. They are part of your content, so deserve attention and care. Check out tips for choosing photos and other images, and avoiding common mistakes which can help ensure your website looks professional.